Custom domain
Add a custom domain to serve your webapp from a friendly URL.
Without a custom domain, DevLaunchPad deploys your webapp to a URL like xxxxxxxxxxxxx.cloudfront.net.
A custom domain loads your website from a fixed domain like demo.devlaunchp.ad.
Before you start
To configure a custom domain, first there are two values you need:
- RootDomain - the actual domain name where your production webapp will be served e.g.
demo.devlaunchp.ad,tomgregory.com. - HostedZoneId - the AWS DNS resource linked to your custom domain, that DevLaunchPad uses to add various DNS records.
Find a domain name using services like namecheap.com, godaddy.com or AWS Route 53.
If buying through Route53, AWS automatically sets up a Hosted Zone for you.
When buying through another provider, follow these steps to associate AWS with your custom domain.
- Go to Hosted zones.
- Select Create hosted zone.
- Enter the domain name.
- Select Create hosted zone.
- Copy the nameserver details. Add them as an
NSrecord in the DNS settings of your domain provider.
Here's how that looks in namecheap.com.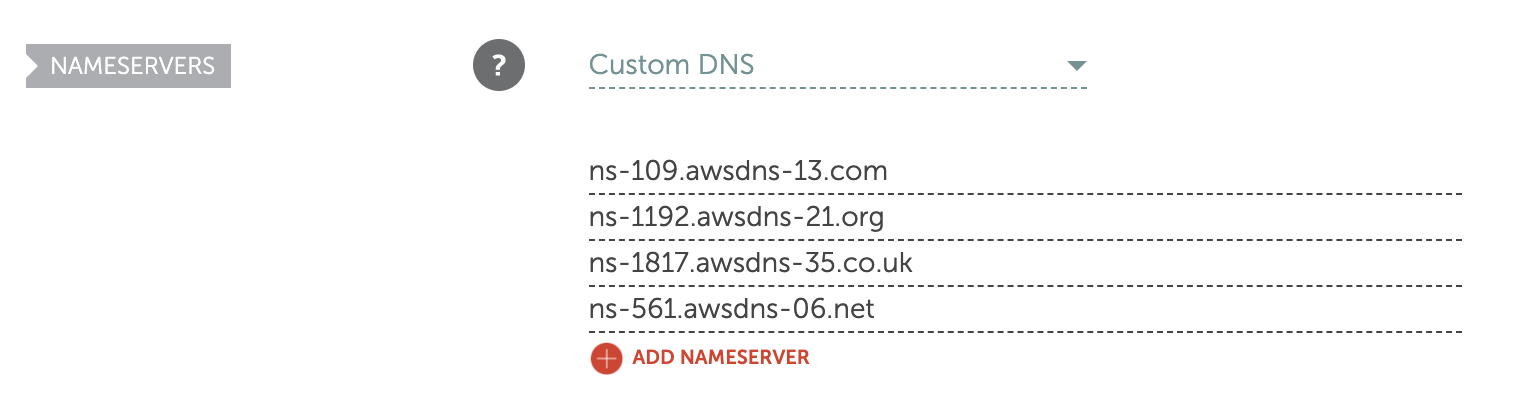 The DNS settings for your domain are now managed by AWS.
Whichever approach you use, copy the Hosted zone id from the AWS Console and move onto the next step.
Configuration
Open deployment-params.yml and set the HostedZoneId and RootDomain.
HostedZoneId: 'your-hosted-zone-id'
RootDomain: 'yourdomain.com'
Deployment
Run npm run deploy.
DevLaunchPad automatically detects the custom domain details and configures:
- DNS records
- TLS certificate
- AWS SES (Simple Email Service) resource you can enable with the Email feature
The WebsiteURL printed in the console output now uses your custom domain.
- For the dev environment, it's prefixed with
dev.e.g.https://dev.demo.devlaunchp.ad. - For the prod environment, it uses the root domain e.g.
https://demo.devlaunchp.ad.
Congratulations! You can now access your webapp through a friendly domain name.